In today’s fast-paced software development environment, project collaboration has become a common practice. One essential tool that empowers developers to work together effectively is GitHub, a web-based platform that provides version control and collaboration features. If you’re an entry-level developer, it’s crucial to understand the basics of using GitHub to manage your code repositories and collaborative development. This collaborative GitHub development for beginners guide will take you through the steps to get started and share some insights into why different branches are important.
Setting up Git
Before you can dive into GitHub, you need to install Git on your computer. Git is a distributed version control system that will help you manage your project files, keep track of source code history. Tracking code history and changes enables seamless collaboration with others.
You can download Git from its official website: https://git-scm.com/downloads
Creating Your GitHub Repository
Step 1: Initiating Your Repository
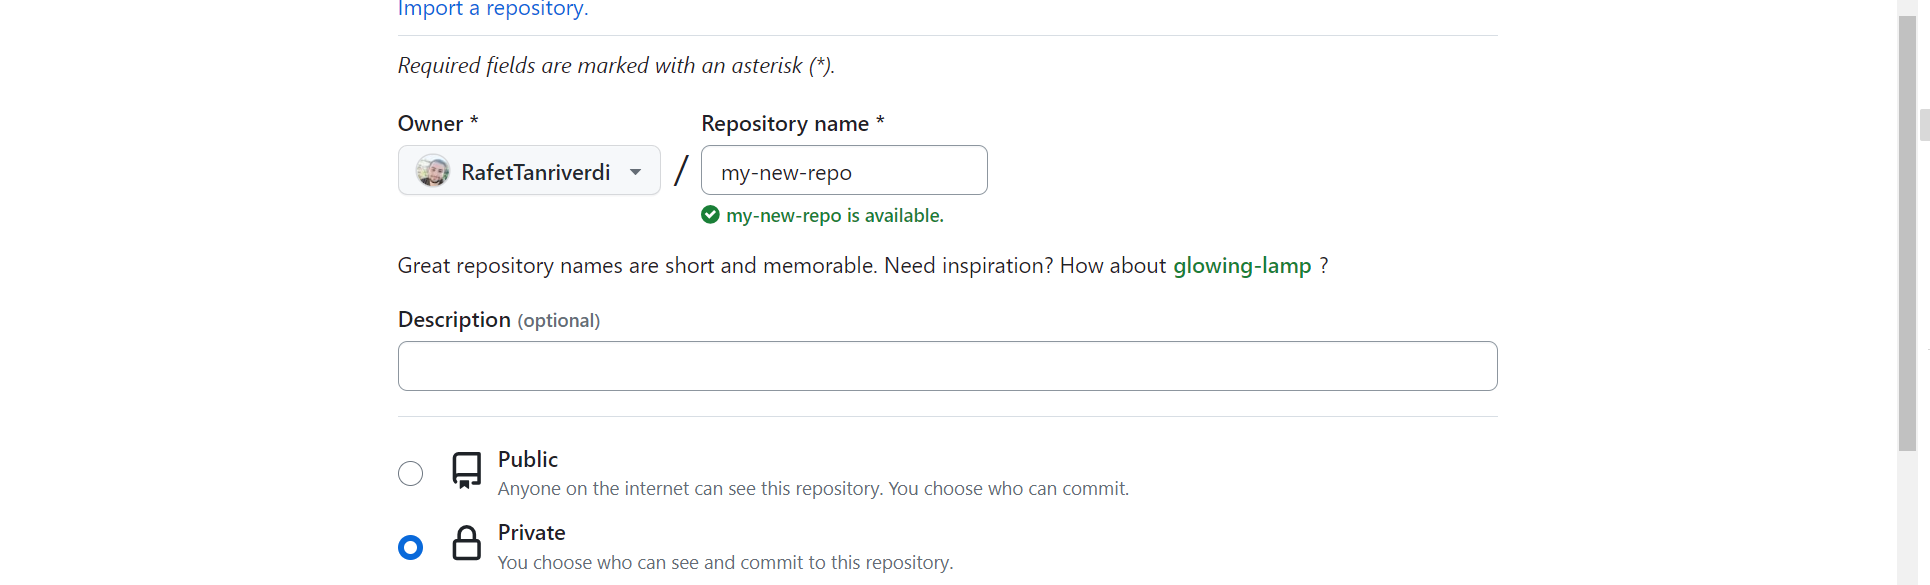
To begin, you need a GitHub account. Once you’re set-up, click on “Create New Repo” on your GitHub dashboard. Here, you’ll need to provide a name for your repository and decide whether it should be public (visible to everyone) or private (restricted to collaborators). After this, you can create your repository.

Step 2: Uploading Your Local Project
Now, it’s time to take your locally developed project and upload it to your GitHub repository.
Here are the steps to follow:
- git init: This command initializes the .git folder within your project, which is responsible for carrying your GitHub configurations.
- git add . : By running this command, you indicate the folders that need to be included in the repository. The "." implies including all folders in your project.
- git commit -m "your commit message" : This is where you explain the updates you've made in your project.
- git branch -m main : In most cases, repositories are stored in the main branch, but it's possible to have multiple branches for different purposes.
- git remote add origin https://github.com/yourAccountName/your-repo-url : This command sets the URL of your GitHub repository where your project will be stored.
- git push -u origin main : This action pushes your project to the main branch of your repository.
These are the steps you should follow when uploading your project to your repository for the first time. However, if you want to update your repository with changes, the steps are shortened as follows:
- git add .
- git commit -m "your commit message"
- git push -u origin main
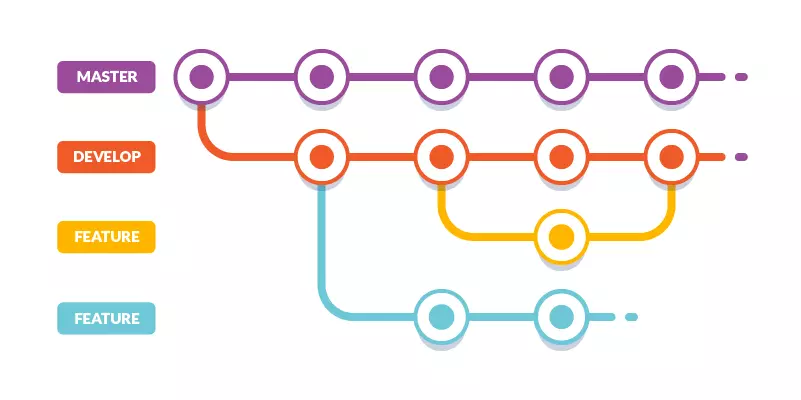
Understanding the Significance of Different Branches
Collaboration
In a collaborative software development project, you might have multiple developers or development teams working simultaneously. In this scenario, it’s essential to have separate branches. Once the desired improvements are made in these branches, you can merge them into the main branch.
Bug Fixes
When a bug occurs in the main branch during the project’s development, you can create a new branch without interrupting ongoing work to fix the issue. After testing and approval of your changes, you can merge them back into the main branch.
Code Review
Branches are often created for code reviews. In projects where developers work together, changes made in branches are subject to a pull request (PR). The changes are reviewed before merging into the main branch.
Isolation of Features/Changes
When you make improvements on a different branch, your main branch remains isolated from changes and errors. This ensures your main branch remains unaffected until you resolve issues, finalize improvements, and perform the merge.
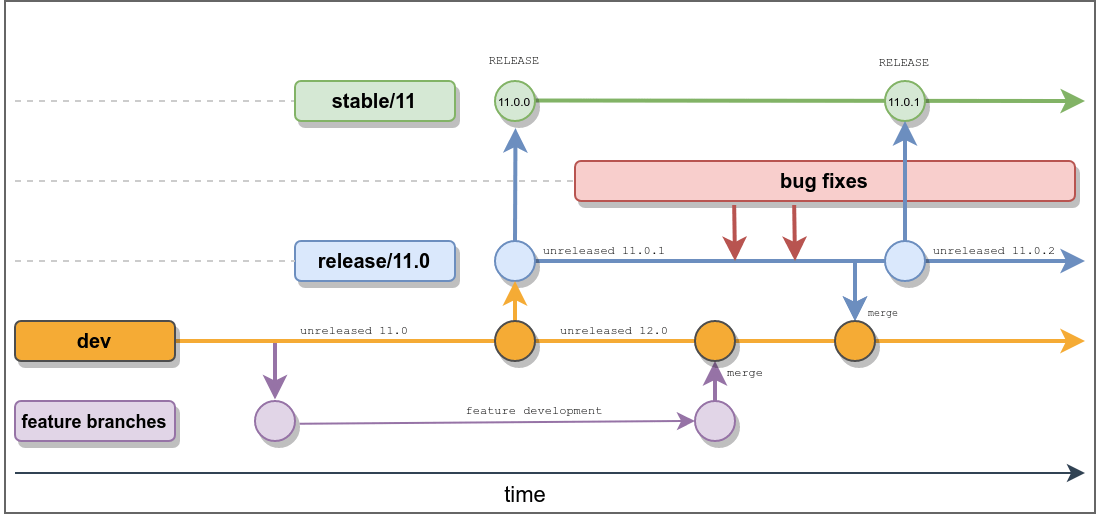
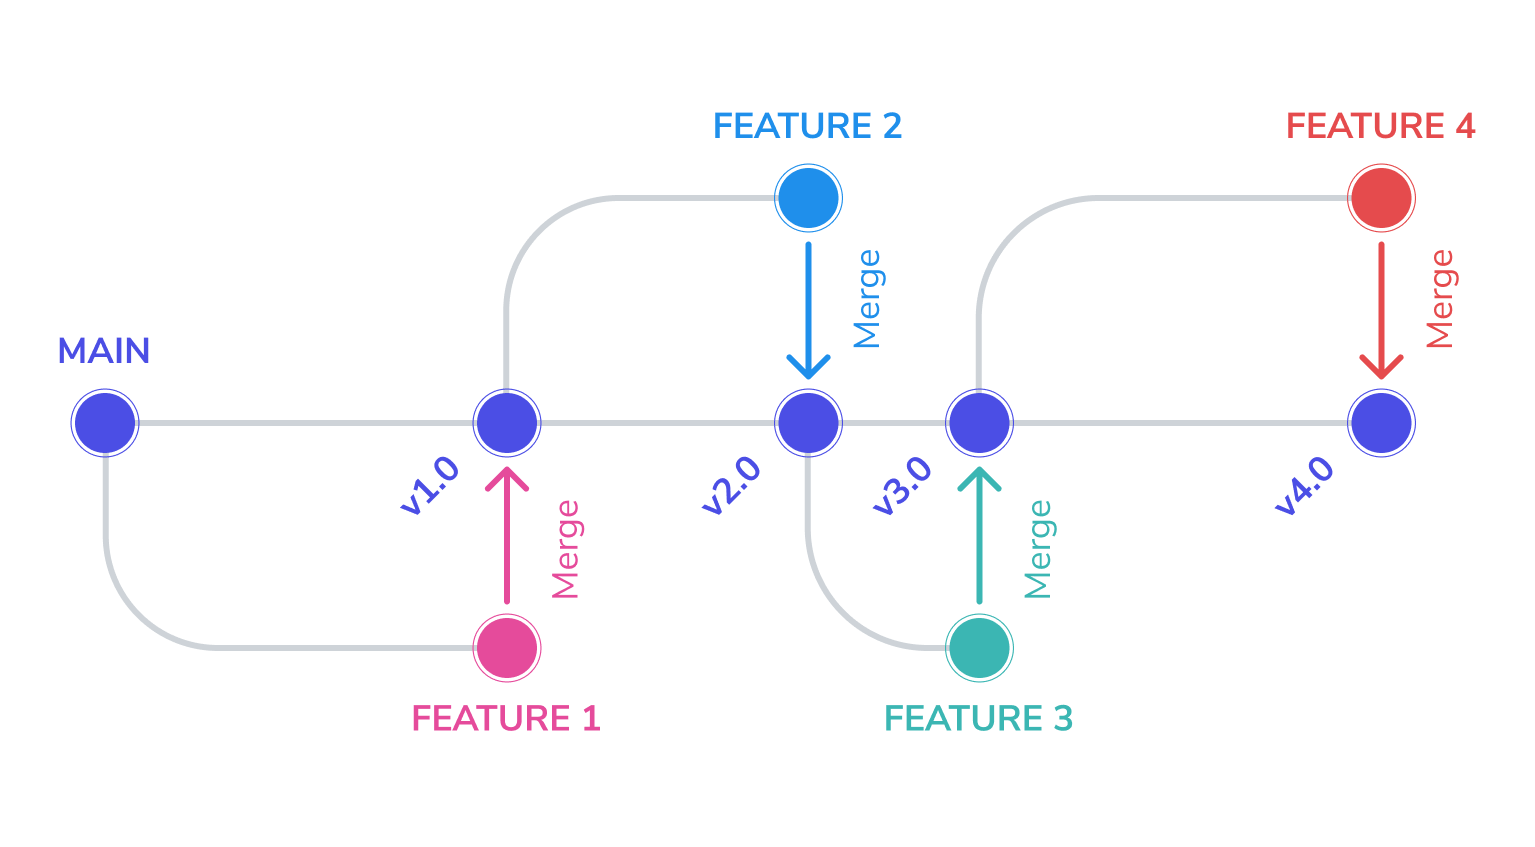
Versioning and Releases
Suppose your project is live on the main branch, and you want to add a new module or improve existing ones. In such a scenario, opening a new branch allows you to develop and test the module without impacting the main branch. Your changes won’t affect your project until the merging process.
Collaborating with Others
To truly harness the power of GitHub for collaborative development, you need to invite other team members or collaborators to your repository. By doing so, you grant them specific access permissions, whether your repository is public or private. To protect your main branch and ensure that merge operations won’t proceed without your approval when a pull request (PR) is submitted, consider the following steps:
- Go to your repo > settings > collaboration > add people to invite collaborators.
- The person added to the project should first clone the project to their local environment using the following command:
git clone https://github.com/yourAccountName/your-repo-url
After making the desired changes and improvements in the project, they can create a new branch and push the project by following these steps:
- git add .
- git commit -m "your commit message"
- git branch -m your-new-branch-name
- git push -u origin your-new-branch-name
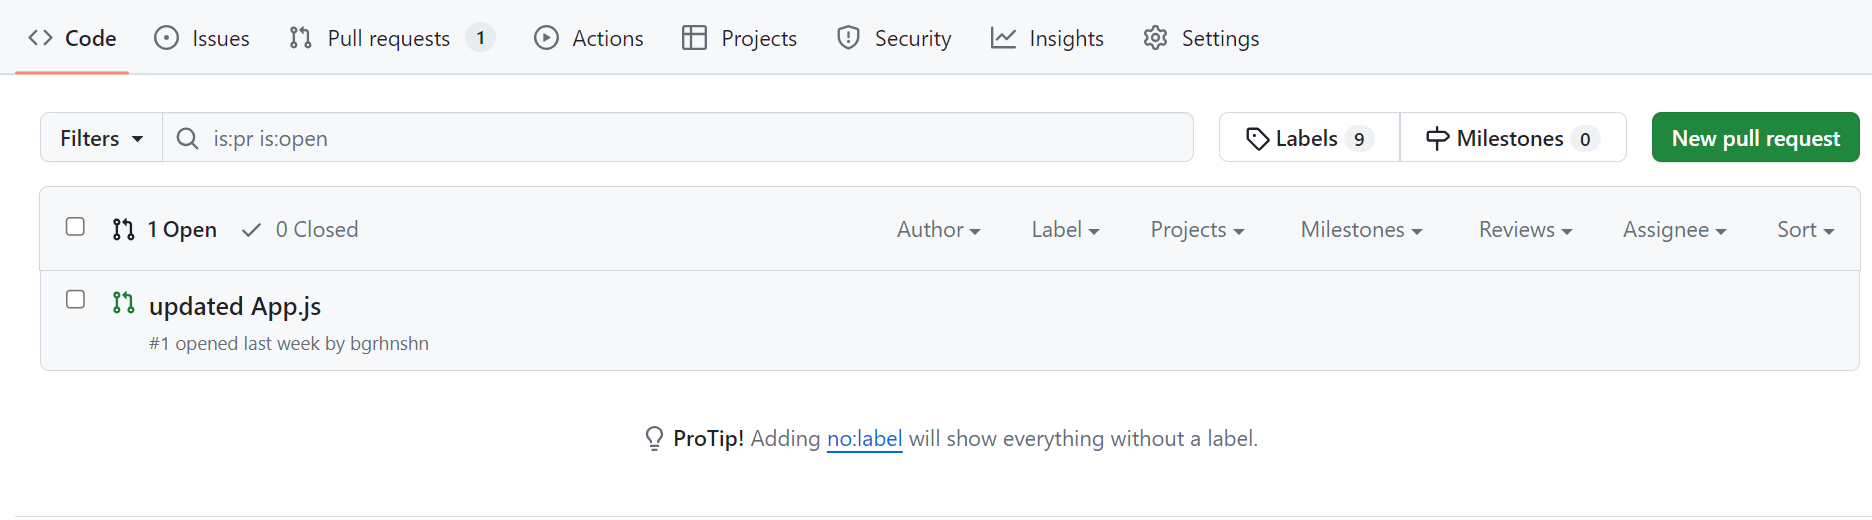
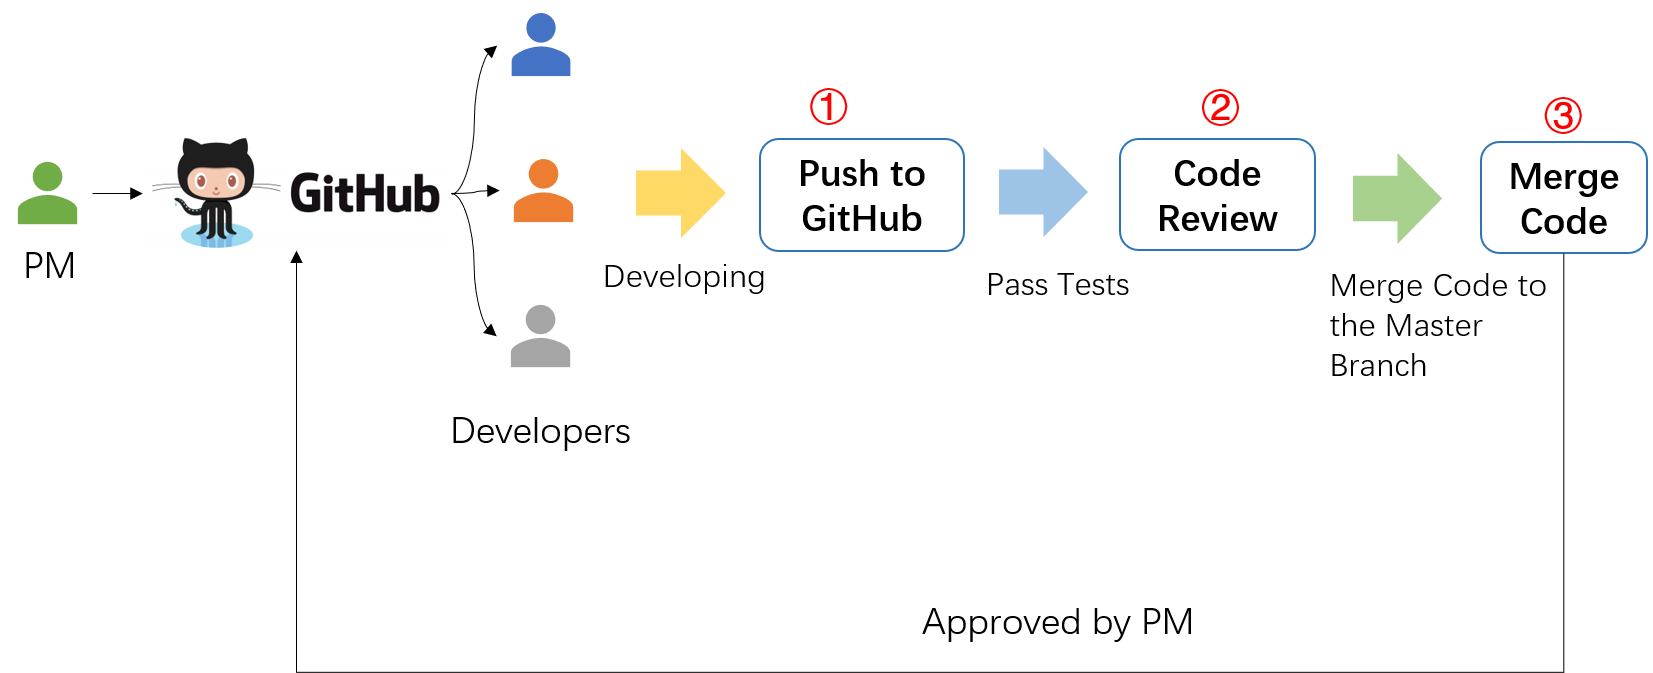
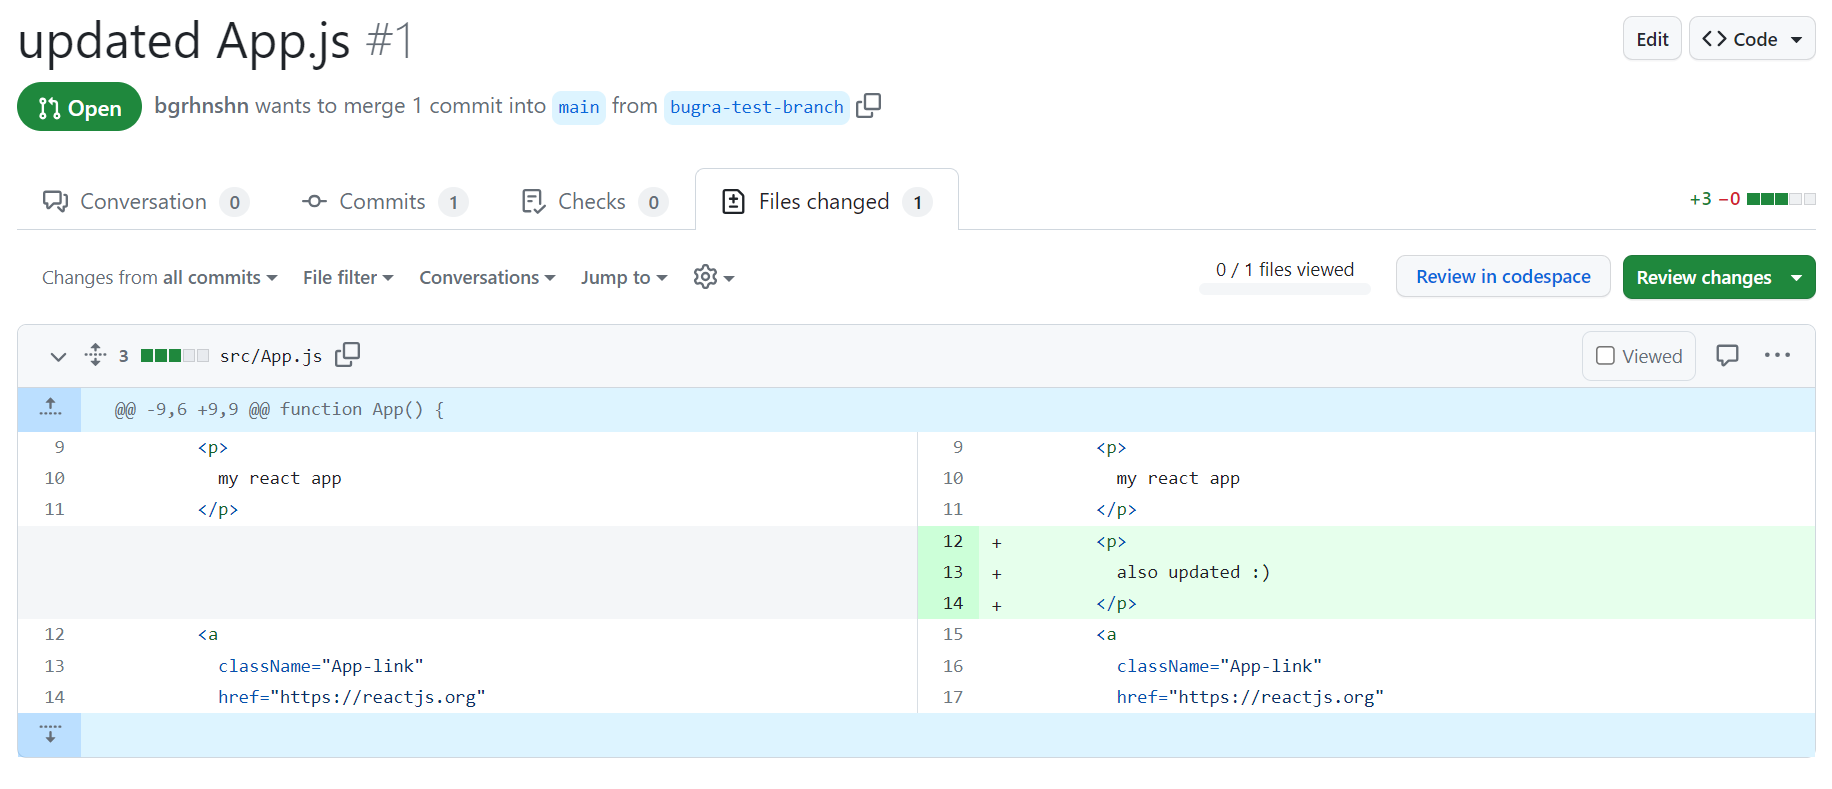
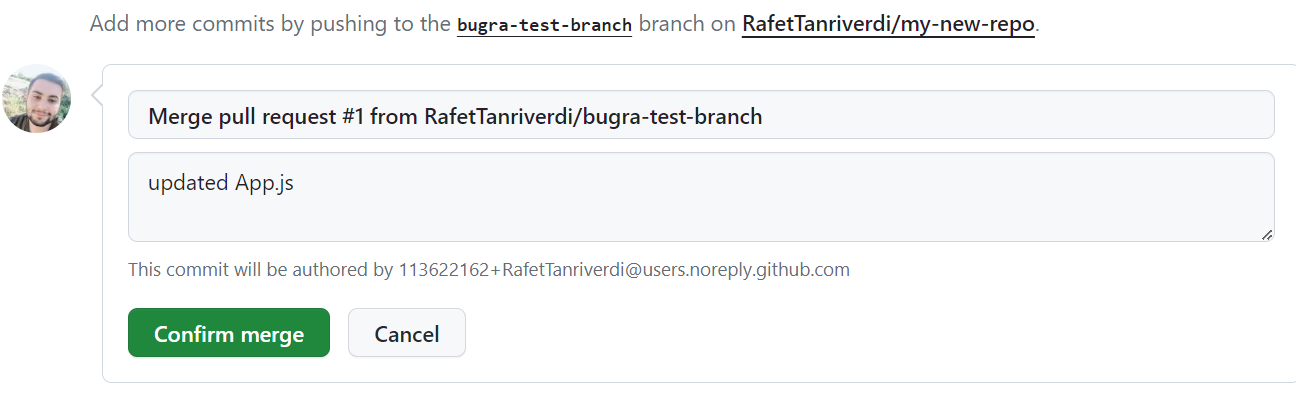
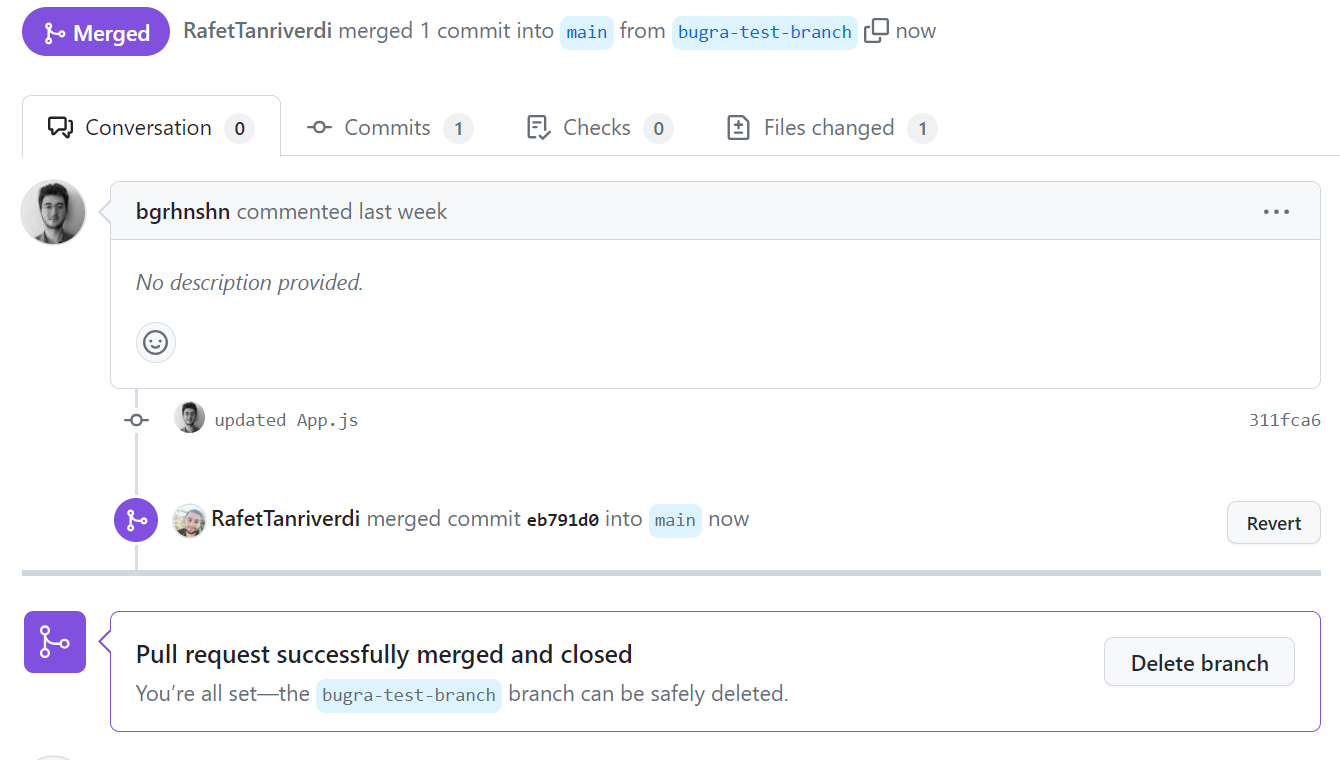
Your developed code will now be visible in a new branch on GitHub, but these changes won’t affect the main branch until you create a pull request using the “pull requests” option. This request will be sent to the repository owner, and after a review, the merge process will be executed. See the example below:
By understanding these fundamental GitHub concepts and best practices for collaborative development, you’ll be on your way to becoming a more effective and productive developer. GitHub is a powerful tool for collaboration and mastering it will undoubtedly benefit your software development journey.
Enjoyed this article? Check out our blog homepage for more!